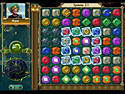
Кладбище орков — один из квестов основной сюжетной линии игры Gothic.
Описание[]
Священная Церемония Братства окончена, но не принесла того, что ожидали гуру. Прежде, чем упасть без сил, лидер Братства, Ю’Берион сумел узреть видение, ниспосланное Спящим — древнее Кладбище орков, расположенное неподалеку от лагеря. Кор Ангар распорядился отправить туда экспедицию стражей, чтобы найти разгадку таинственного видения, но от них слишком долго не было вестей. Тогда он попросил о помощи Безымянного — необходимо найти Люкора и стражей и передать Кор Ангару все, что им довелось выяснить. Увы, когда Безымянный пребывает на место, он обнаруживает лишь орочьих разведчиков и мертвых последователей Спящего. Выжить удалось только Люкору. Вместе они пробираются в самую глубь склепа, но ничего там не находят. Ярый последователь Спящего приходит в отчаяние и впадает в безумие — Безымянному приходится убить напавшего Люкора и рассказать Кор Ангару о неудаче.
Прохождение[]
- Говорим с Кор Ангаром, просим награду и отправляемся на кладбище орков. Можно поговорить с Таласом, чтоб он проводил до гробницы.
- Вход в гробницу охраняют 3 орка-разведчика и 4 кусача.
- Входим в гробницу и обследуем первый сводчатый зал. Тут бродят два орка-разведчика и растут разные травы.
- (Необ.)Часть предметов скрыта на мумиях орков за решетками — чтоб их открыть, необходимо нажать переключатели — обычно, они находятся рядом с уже открытыми клетками или же внутри них. В клетках можно найти множество полезных предметов — свитков заклинаний, амулетов и различных зелий.
- Проходим во второй сводчатый зал — там бродят три орка-разведчика и можно собрать немного трав.
- Проходим дальше, в третий сводчатый зал — видим Идола Люкора, который отчаянно бьется против трех орков, окруженный трупами сопровождавших его стражей. Помогаем ему отбиться и говорим с ним. Обыскиваем зал.
- Идол Люкор говорит, что из зала ведут три тоннеля. Необходимо обыскать их. Начать можно с любого.
- Проходим в самый правый от входа тоннель. Спускаемся, убираем двух орков-разведчиков, обыскиваем помещения. В самом конце видим закрытую решетку. Если Идол Люкор не застрял где-нибудь в коридоре, он любезно согласится дать подсказку — укажет, что неплохо бы поискать в нишах, имея ввиду грот в стене. Переключатель, который открывает решетку, очень хорошо сливается со стеной, так что можно запросто его пропустить. Открываем решетку, обыскиваем помещение.
 обрывок свитка
- Говорим с Люкором, отдаем ему часть свитка — узнаем, что это свиток орочьего заклинания и где-то должна быть его вторая часть.
- обрывок свитка
- Идем в средний тоннель. Убиваем двух орков-разведчиков и обыскиваем помещение.
- обрывок свитка
- Отдаем свиток Люкору.
- обрывок свитка
- По возвращении к месту развилки Идол при помощи рун на стенах восстанавливает манускрипт и возвращает его уже в готовом виде, утверждая, что это заклинание телепортации, но сработает оно только в определенном месте.
- орочье заклинание
- Идем в третий тоннель. Тут поджидает этакий мини-босс гробницы — орк-боец в компании четырех разведчиков. Убиваем его и идем к середине зала. Идол Люкор подбежит, скажет, что место необычное и укажет путь к скрытой в стене двери.
- Идем к стене, используем свиток. Оказываемся в тайном помещении, где проводился обряд, который и узрел Ю’Берион во время видения. Рекомендуется обыскать помещение, прежде, чем впустить Идола — найденный меч весьма неплох и может пригодиться, если нет лучшего оружия.
- Впускаем Люкора, повернув лебедку. Пройдя помещение до алтаря, Идол падает на колени от отчаяния — тут ничего нет. Он сходит с ума и нападает. Убить его не составит слишком уж большого труда. Можно воспользоваться найденным мечом — его вполне хватит.
- Возвращаемя в Болотный Лагерь и говорим Кор Ангару о случившемся.
Примечание[]
- Если бой с орками вызывает затруднение, можно вытаскивать их по одному, однако для этого необходимо отводить агрессора как можно дальше от собратьев — иначе услышат и прибегут на помощь.
- Люкор в процессе прохождения квеста может потеряться в подземелье. Если вы столкнулись с этой проблемой решение — в Marvin режиме нажать «Home» что бы перенестить в него и выпутаться напровить куда идти. Видео — https://www.youtube.com/watch?v=gvgBK0N12Q4&t=19s
- Если Люкор застрял в соседней комнате, а вы подобрали Половину пергамента без него, и после соединения двух половин в заклинание и повторгого возвращения в комнату где подобрали половину заклинания без Люкора, это почти гарантированно приведет к остановке квеста и невозможности пройти дальше по сюжету. Люкор просто будет стоять посреди комнаты и никуда не идти.
- Что бы это решить, надо в marvin режиме вызвать книгу на немецком «Zwinge Baal Lukor in den Followmode» (Заставить Идола Лукора перейти в режим следования). Для этого в marvin режиме набрать: insert Lukor_Bugfixbook. Прочитать книгу, и Люкор снова начнет следовать за Безымянным.
 Наконец-то сбылась мечта идиотов. Болотные придурки вызвали Спящего, а что из этого получилось, вы и сами видели. Ну а расхлебывать, как всегда, вам. Кор Ангар уже отправил бойцов на кладбище орков, именно их видел во время видения ЮБерион. Теперь Кор Ангар просит отправиться туда вас, напоследок: +100 руды, кольцо, и снова компания труса Таласа. ЮБерион не в себе. Храм пуст. Отличный случай почистить сундуки. Именно этим вы сейчас и займетесь. Начнем с правой комнаты, если смотреть из входа: ->, <-, ->, <-, ->, ->. На очереди сундук из средней комнаты: <-, <-, ->, <-, ->, ->, <-, <-. Теперь опустошим левую комнату: <-, <-, ->, <-, ->, ->. Немного руды и эликсиров нам не в тягость. Итак, об одном мы позаботились, но есть еще одно дело, его желательно сделать до похода на орское кладбище, если конечно, вы еще не сделали этого. У меня уже давно висит 10-й уровень, а это значит, что вас могут принять в ряды стражников.
Отправляйтесь в Старый Лагерь к Торусу. Этот шаг позволит вам приобрести лучшие доспехи и оружие, что крайне важно в сложившейся ситуации. Вы также можете пойти и магическим путем, подойдя к Мильтену, это дело вкуса. Я стаю стражником. Мне больше нравится меч и арбалет, нежели магия, ею вы еще обучитесь, став магом воды (по сюжету это произойдет позже). Итак, вы перед Торусом, вы стражник. Не отходя далеко, загляните к Равену, доложив ему о делах в братстве: +500 опыта. Теперь за доспехами и оружием к Стоуну. Но эти доспехи не очень внушительны, купите у Стоуна Обычные доспехи стражника за 1650 руды, тяжелые он вам все равно не продаст. Загляните также к Скипу, у него уже накопилось немного руды и стрел. Мы вооружены и защищены, но я бы не спешил назад. Если у вас есть очки обучения, подойдите к Скорпио, он тренирует стражников во дворе замка. За 200 кусков руды он обучит вас 1-му уровню стрельбы из арбалета. Для этого достаточно 10-ти очков обучения. Но лично я на этом не останавливаюсь, осваиваю и второй уровень: -300 руды, -20 очков обучения – и вы мастер. Скупайте всю руду, чем дальше вы будете проходить, тем все больше ее будет не хватать. Загляните к Фиску.
Кроме руды, вы можете приобрести самое реальное одноручное оружие на данный период – Палаш, с уроном: 55, требуемой силой: 26 и ценностью: 240. Давно мы не были у Кавалорна. У него наверняка имеется руда и оружие. И еще, если вам не терпится отработать навыки стрельбы из арбалета, забрать его можно у Пачо, которого можно отыскать, выйдя через Южные ворота и направившись в земли орков. У Пачо имеется Легкий арбалет с уроном: 50 и требуемой ловкостью: 25.
 Теперь на кладбище орков. Если вы не знаете, где оно находится, обратитесь к Таласу. Перейдя через мост, вы в полной мере ощутите активную часть Готики. Орки – это не безобидные гоблины. Но не бойтесь, в Готике вам еще неоднократно придется встретится с ними. Пробираясь по пещере, хорошо пошарьте по склепам с мумиями, из тел которых можно извлечь магические свитки, целебные эликсиры, кольца и амулеты, в общем, полный фарш. Возле склепов есть переключатели, которые открывают помещения закрытые решетками. Два переключателя в левой половине зала, еще два в правой. Пройдя дальше, вы услышите крики Люкора, которого атакует добрая кучка готических орков, помогите ему: +750 опыта. Идол Люкор не захочет возвращаться, пока не откроет тайну орков, и в этом поможете ему вы. Для начала необходимо найти две половины свитка. Это просто, стоит только сказать, что в последнюю очередь стоит идти в левый тоннель.
Один из свитков находится в пещере за металлической решеткой. Чтобы забрать его, поищите переключатель в соседней пещере. Пройдя через третий тоннель, вам предстоит столкнуться с воином орков. Тут то вы сделаете выводы, что обычные орки по сравнению с ним, как безобидные твари. Держите его на расстоянии. В этом зале, Идол Люкор найдет загадочную стену и даст вам свиток Орочьего портала. Телепортируйтесь и откройте врата. Очередная пещера. Но оттого, что здесь опять ничего нет, Люкор сходит сума. Он хочет привести вас в жертву, чтобы хоть как-то задобрить господина. Но мы же ему не позволим: +500 опыта. Возвращайтесь в Болотный Лагерь. Рассказав Кор Ангару о произошедшем: +2000 опыта.
Кор Ангар просит принести целебные травы, растущие на болотах. Там еще водятся болотожеры. Собрав определенное количество: +1500 опыта. Но травы ЮБериону уже не помогут. Кор Ангар разочарован в Спящем, и он ищет другой способ, как покинуть стены колонии, защищенные барьером. Это возможно осуществить с помощью магов Воды. Кор Ангар дает вам ключ от сундука, стоящего в лаборатории Кор Галома. Этого безумца там нет. Он покинул стены братства и пошел искать способы пробуждения Спящего. Там лежит ранее добытый вами камень юнитор. Кор Галом дал вам руну телепортации в Болотный Лагерь. Теперь не придется попусту топтать ноги. Забрав юнитор, идите в Новый Лагерь к магам Воды. По дороге можете зайти в Старый Лагерь и как-то распределить очки обучения. Я набрался ловкости. Напротив домика Кавалорна есть дорога, пройдя по которой, вас сразу же поприветствуют глорхи. Если
Статья опубликована 2007-06-19 в 13:04
Автор: Евгений Катрич
Категории: Прохождение игр, Игра Готика
Игра Gothic
A list of spells that can be found or bought in Gothic II: Night of the Raven.
Light
Khorinis
- Xardas’ Tower, in a chest on the top floor
- Chest in Zuris’ house
- Behind Xardas’ Tower [1]
- On the way from Dead Harpy Tavern to the Pyramids, in a crate next to destroyed caravan [2]
Valley of Mines
- Wooden roof of the castle prison [3]
- Cave with a door near the Mountain Fortress, on the table [4]
- On the ground right after entering the Mountain Fortress. On the right [5]
Merchants
- Cronos in Khorinis, chapter I (5 scrolls). Chapter II in Jarkendar (5 scrolls)
- Gorax in chapter I (5 scrolls)
- Isgaroth in chapter I (5 scrolls)
- Jora in chapter I (1 scroll)
- Zuris in chapter I (6 scrolls)
Other
- Orlan will offer you scrolls when delivering wine from Gorax as a novice, which include Light (2 scrolls)
- Can be chosen as a reward for delivering a message to Isgaroth and coming back to Vatras.
- Vatras has them in his inventory (2 scrolls)
")
")
Sleep
Khorinis
- Chest in Zuris’ house (2 scrolls)
- On the way from Dead Harpy Tavern to the Pyramids, in a crate next to destroyed caravan
- Alchemy table on the Paladin ship
Jarkendar
- Orc tent in the canyon
Merchants
- Gorax in chapter I (1 scroll), and in chapter II (2 scrolls)
- Isgaroth in chapter I (1 scroll), and in chapter II (2 scrolls)
- Ignaz in chapter I (1 scroll)
- Lutero in chapter II (1 scroll)
- Sengrath in chapter II (2 scrolls)
- Zuris in chapter I (1 scroll)
Other
- Dyrian will offer you a Sleep scroll durning your test of fire, in exchange for helping him stay in monastery
Small Lightning
Valley of Mines
- Next to a campfire in a bandit camp
Jarkendar
- In the bandit camp, next to a wooden beam in front of Scatty’s stand
- Bandit camp, chest right behind Fortuno’s chest, next to a bunch of crates.
- By the campfire in front of the first mine in the canyon
- On the plateau above the pyramid you come out of after first time arriving in Jarkendar
- Gold mine, in the cave filled with minecrawlers where you fight Bloodwyn
Merchants
- Cronos in Khorinis, in chapter I (5 scrolls). Chapter II in Jarkendar (5 scrolls)
- Gorax in chapter I (5 scrolls)
- Isgaroth in chapter I (5 scrolls)
- Sengrath in chapter II (3 scrolls)
- Vatras in chapter VI (2 scrolls)
- Zuris in chapter I (5 scrolls)
Other
Vatras has them in his inventory (2 scrolls)
Heal Light Wounds
Khorinis
- Xardas’ Tower, in a room behind the bars next to Xardas, in a chest
- Xardas’ Tower, bottom floor chest
- In Cassia’s chest.
- Next Canthar when you first meet him in front of Lobart’s Farm
- On the Innos shrine in between Black Troll’s territory and the cave hidden behind the bushes
- On the way to the Lester’s valley under Xardas’ Tower, behind a bush
- A !rune! of this spell can be found on the passage to the Valley of Mines, which is filled with orcs. It lays next to a campfire
Jarkendar
- In the corner by the plateau on which Healer’s House on the swamp is located.
- On the small pyramid where most of the water mages are resting, next to a chest.
- Gold mine, in the cave filled with minecrawlers where you fight Bloodwyn, next to the hatched minecrawler eggs.
Merchants
- Cronos in Khorinis, in chapter I (5 scrolls). Chapter II in Jarkendar (5 scrolls)
- Isgaroth in chapter I (5 scrolls)
- Vatras in chapter VI (2 scrolls)
- Gorax in chapter I (5 scrolls)
Other
- It might rarely drop from Orc Elites
- Orlan will offer you scrolls when delivering wine from Gorax as a novice, which include Heal Light Wounds
- Gorax will reward you with them when you complete sausage distributing task (2 scrolls)
- Can be chosen as a reward for delivering a message to Isgaroth and coming back to Vatras
- Vatras has them in his inventory (2 scrolls)
Summon Goblin Skeleton
Khorinis
- On the Innos shrine a bit behind Jack’s Lighthouse
- A !rune! with this spell can be found in Sekob’s chest where Irdorath book is kept, only when you get a key from Xardas in chapter III
Valley of Mines
- Old Xardas’ Tower, left room on the bottom floor
Jarkendar
- In the giant minecrawler cave connecting the canyon and the swamp, behind a gravestone
- In a buried treasure found in the corner next to Healer’s House
Merchants
- Cronos in Khorinis, in chapter I (2 scrolls). Chapter II in Jarkendar (2 scrolls)
- Gorax in chapter I (5 scrolls)
- Isgaroth in chapter I (2 scrolls)
- Karras in chapter I (1 scroll), chapter II (1 scroll), chapter III (1 scroll), chapter IV (1 scroll), chapter V (1 scroll)
- Zuris in chapter I (1 scroll)
Other
- Orlan will offer you scrolls when delivering wine from Gorax as a novice, which include Summon Goblin Skeleton
Fire Arrow
Khorinis
- In a cave near Khorinis, with an Orc, Wolf and a teleport
- Dexter’s bandit camp, next to a wooden shack
- Behind Xardas’ Tower
- In a cave leading to Lester’s valley under Xardas’ Tower, guarded by young Field Raiders
- On the wooden crates by the ledge next to a place where you first meet cavalorn
- Waterfall next to Xardas’ Tower, behind the trees (2 scrolls)
- On the plateau above Lester’s valley
Valley of Mines
- On the old exchange site. Right after entering the valley via dangerous orc passage, on the right.
- On the ground, guarded by a group of Snappers near Fajeth’s camp
Jarkendar
- In a cave on the far north of the swamp, guarded by a Fire Theind
- On a broken stone wall, right where you meet Alligator Jack
- Shortly before the hollow you enter with Alligator Jack, laying on the grass
- A !rune! with this spell can be found on the stone ground with pillars, near Juan’s cave on the swamp
Merchants
- Cronos in Khorinis, in chapter I (5 scrolls). Chapter II in Jarkendar (5 scrolls)
- Engor in chapter I (3 scrolls)
- Gorax in chapter I (5 scrolls)
- Isgaroth in chapter I (5 scrolls)
- Zuris in chapter I (20 scrolls)
Other
- Babo will give you one if you decide to give him second sausage.
Summon Wolf
Khorinis
- On the alchemy table on the ship.
Valley of Mines
- On the plateau right above the cave with Geppert and Kervo, later Dragon Hunters.
Other =
- Karras rewards the hero with one scroll when delivering him scrolls from Ignaz
Merchants
- Cronos in Chapter II in Jarkendar (2 scrolls)
- Gorax in chapter II (5 scrolls)
- Isgaroth in chapter II (5 scrolls)
- Karras in chapter II (1 scroll), chapter III (1 scroll), chapter IV (1 scroll), chapter V (1 scroll)
- Sengrath in chapter II (1 scroll)
- Zuris in chapter I (1 scrolls)
Dust Devil
Jarkendar
- Gold mine, in the cave filled with minecrawlers where you fight Bloodwyn, next to the hatched minecrawler eggs.
Merchants
- Cronos in Chapter I (1 scrolls), chapter II in Jarkendar (3 scrolls), chapter III (2 scrolls) , chapter IV (3 scrolls), chapter V (3 scrolls)
Fireball
Khorinis
- In Xardas’ Tower, in a chest behind bars next to Xardas
- Ground floor chest in Xardas’ Tower (2 scrolls)
- Cassia’s chest (2 scrolls)
- On the way to the bandits cave next to a small forest in front of Lobart’s Farm, behind a rock
- In a cave full of goblins, east from Dead Harpy Tavern, where you retrieve stolen Innos statue and find Greg’s treasure
- On the way to the Lester’s valley under Xardas’ Tower, behind a bush
Jarkendar
- In the house of the Healers
- In the big minecrawler cave connecting the swamp and the canyon, next to one of the three chests inside it
Irdorath
- In the corridor leading to the room right before the great switch puzzle room
- First right room in the hall with Black Mage, next to a book stand (3 scrolls)
Merchants
- Cronos in chapter II in Jarkendar (3 scrolls)
- Gorax in chapter II (5 scrolls)
- Gorax in chapter II (5 scrolls)
- Zuris in chapter I (10 scrolls)
Other
- If you bring Vatras 5-9 Old Stone Tablets at once, he will reward you with one scroll
Wind Fist
Khorinis
Valley of Mines
- Room left of the castle gate, opposite to the room with switch that opens the gate (2 scrolls)
- Right exit of Marcos’ excavation site, go straight forward and you’ll find yourself in an underground path, the scroll is next to a Beliar shrine
Jarkendar
- After crossing under the stone arch in canyon, on the ground next to a cactus
Merchants
- Gorax in chapter I (1 scroll), chapter II (4 scrolls)
- Sengrath in chapter II (3 scrolls)
- Zuris in chapter I (3 scrolls)
Other
- Neoras rewards you with one scroll when you bring him 7 Fire Nettles as a novice
Ice Arrow
Khorinis
- Chest in Zuris’ house
- On the roof of Garvell’s workshop
- In a cave near Khorinis, with an Orc, Wolf and a teleport
- On the way from Dead Harpy Tavern to the Pyramids, in a crate next to destroyed caravan
Jarkendar
- West ruins of water mages’ camp
- On the small pyramid where most of the water mages are resting, next to a chest.
Merchants
- Cronos in chapter II in Jarkendar (3 scrolls)
- Engor in chapter I (3 scrolls)
- Gorax in chapter II in (5 scrolls)
- Isgaroth in chapter II in (5 scrolls)
- Zuris in chapter I (8 scrolls)
- Vatras in chapter VI (2 scrolls)
Other
- Can be chosen as a reward for delivering a message for Isgaroth and coming back to Vatras
Ice Lance
Merchants
- Cronos in Chapter I (5 scrolls), chapter II in Jarkendar (5 scrolls), chapter III (2 scrolls) , chapter IV (3 scrolls), chapter V (3 scrolls)
Geyser
Merchants
- Cronos in chapter II (2 scrolls) in Jarkendar, chapter III (2 scrolls), chapter IV (3 scrolls), chapter V (3 scrolls)
Heal Medium Wounds
Khorinis
- At the top plateau near Khorinis, just above where Niclas is found
- In a cave near Khorinis, with an Orc, Wolf and a teleport
- Behind Onar’s house on the right side, near a camp full of young wolves that are troubling Pepe (2 scrolls)
- On the way from Dead Harpy Tavern to the Pyramids, in a crate next to destroyed caravan
Valley of Mines
- In the orc tent in front of the cave with Kervo and Gepper, next to a waterfall
Jarkendar
- On the sinking stone construction, at the start of the wooden platform path leading to the bandit camp.
- At the end of the hollow where you hunt Swamp Rats with Alligator Jack, under a stone wall
Merchants
- Cronos in chapter III (5 scrolls)
- Engor in chapter I (2 scrolls)
- Gorax in chapter III (5 scrolls)
- Isgaroth in chapter III (5 scrolls)
- Sengrath in chapter II (3 scrolls)
Other
- Babo rewards the hero with one scroll when he helps him to retrieve his letter from Igaraz
Fear
Jarkendar
- At the first end of Adanos’ Temple, full of Raven’s Zombies
- Inside Khardimon’s crypt in the gold mine
- Next to a campfire on a rock, right behind Eremit’s house
Merchants
- Cronos in chapter III (2 scrolls)
- Gorax in chapter III (2 scrolls)
- Isgaroth in chapter III (2 scrolls)
Oblivion
Khorinis
- Inside Paladin’s barracks in the upper quarter, behind a closet on the first floor, can be opened with a switch next to it
- Next to the mine entrance in Dexter’s bandit camp
- Inside the gorge under Dexter’s bandit camp
Merchants
- Ignaz in chapter I (5 scrolls), chapter II (5 scrolls), chapter III (5 scrolls), chapter IV (5 scrolls), chapter V (5 scrolls)
- Lutero in chapter I (1 scrolls), chapter II (2 scrolls), chapter III (3 scrolls), chapter IV (3 scrolls)
Other
- You receive one for free from Ignaz for the «Experiment» quest
Ice Block
Khorinis
- On the cliff with Magic Golem
Valley of Mines
- In the frozen New Camp, north-western plateau above the frozen lake before the Ice Dragon
Jarkendar
- In the house of the Healers
- Just before the wooden platform leading to bandit camp, on the left under a stone wall
- In a cave under a bridge leading to the house of Guardians of the Dead
Merchants
- Cronos in chapter III (3 scrolls)
- Gorax in chapter III (3 scrolls)
- Isgaroth in chapter III (3 scrolls)
- Sengrath in chapter II (2 scrolls)
Create Skeleton
Khorinis
- Monastery, second bedroom of the mages to the left, in the first chest to the right
Jarkendar
- At the end of the first section of Adanos’ temple, next to an altar, guarded by zombies
Valley of Mines
- In Marcos’ mine, left cave, behind a barrel
Merchants
- Cronos in chapter III (3 scrolls)
- Gorax in chapter III (2 scrolls)
- Isgaroth in chapter III (3 scrolls)
- Karras in chapter III (1 scroll), chapter IV (1 scroll), chapter V (1 scroll)
- Zuris in chapter I (1 scroll)
Ball Lightning
Valley of Mines
- Chest on the wooden roof above the prison
- Cave near a crypt where you help Angar to retrieve his amulet
Jarkendar
- Library of the Scholars, left room, on the shelf
Merchants
- Cronos in chapter III (2 scrolls)
- Gorax in chapter III (2 scrolls)
- Isgaroth in chapter III (5 scrolls)
Storm
Merchants
- Cronos in chapter II (2 scrolls), chapter III (2 scrolls), chapter IV (3 scrolls), chapter V (3 scrolls)
- Zuris in chapter I (1 scroll)
Small Fire Storm
Khorinis
- At the top plateau near Khorinis, just above where Niclas is found
- Plateau above Lester’s valley
Valley of Mines
- Spawns in chapter IV. Right before the bridge leading to mountain fortress, in front of a cave, laying on the ground next to the bunch of rocks.
- At the end of Silvestro’s mine, full of minecrawlers
Jarkendar
- At the end of the first section of Adanos’ temple, guarded by zombies
- Just above the exit out of the pyramid when first time arriving in Jarkendar
Irdorath
- In the corridor leading to the room right before the great switch puzzle room
Merchants
- Cronos in chapter III (4 scrolls)
- Engor in chapter I (3 scroll)
- Gorax in chapter III (4 scrolls)
- Isgaroth in chapter III (5 scrolls)
- Zuris in chapter I (3 scrolls)
Lightning
Jarkendar
- In the buried treasure right before the stone arch in the canyon
- In Huno’s house, on the shelf
- After crossing the stone arch in the canyon, before entering a cave (2 scrolls)
- Cave on the far northern part of the beach, next to pirate camp
Valley of Mines
- Under southern part of orc pallisade, in fron of the waterfall
Merchants
- Cronos in chapter IV (3 scrolls)
- Engor in chapter I (1 scroll)
- Gorax in chapter IV (5 scrolls)
- Isgaroth in chapter IV (4 scrolls)
- Vatras in chapter VI (1 scroll)
- Sengrath in chapter II (5 scrolls)
- Zuris in chapter I (5 scrolls)
Large Fireball
Khorinis
- Cassia’s chest
- Monastery, second bedroom of the mages to the left, in the first chest to the right (3 scrolls)
Jarkendar
- In the buried treasure right before the stone arch in the canyon
- Near the beginning of the bandit camp, behind the ruins near Edgor
Valley of Mines
- Ground floor of the mountain fortress, near the rubble leading to Stone Dragon
- Slightly to the west outside the castle, under a rock wall
Merchants
- Cronos in chapter IV (3 scrolls)
- Gorax in chapter IV (3 scrolls)
- Isgaroth in chapter IV (2 scrolls)
Create Golem
Jarkendar
- At the end of the mine found in most western part of the canyon
Valley of Mines
- After crossing the first gate to the frozen New Camp, near a frozen lake
Merchants
- Cronos in chapter IV (1 scroll)
- Engor in chapter I (2 scrolls)
- Gorax in chapter IV (4 scrolls)
- Isgaroth in chapter IV (4 scrolls)
- Karras in chapter IV (1 scroll), chapter V (1 scroll)
- Zuris in chapter I (1 scroll)
Destroy Undead
Khorinis
- At the top plateau near Khorinis, just above where Niclas is found (2 scrolls)
Valley of Mines
- At the top of old Xardas’ Tower, on the table
Jarkendar
- Hidden camp on a rock in the swamp, you can get there by climbing a ladder
Irdorath
- In the lab room, right in front of the room with Archol
Merchants
- Cronos in chapter IV (2 scrolls)
- Gorax in chapter IV (2 scrolls)
- Isgaroth in chapter IV (2 scrolls)
- Zuris in chapter I (3 scrolls)
Waterfist
Merchants
- Cronos in chapter II (1 scroll), chapter III (1 scroll), chapter IV (3 scrolls), chapter V (3 scrolls)
Breath of Death
Irdorath
- In the lab room, right in front of the room with Archol
Large Fire Storm
Khorinis
- At the top of Jack’s Lighthouse
Valley of Mines
- In the old Rice Lord’s house in the frozen New Camp
Jarkendar
- In the orc tent in the canyon
Merchants
- Cronos in chapter V (5 scrolls)
- Engor in chapter I (1 scroll)
- Gorax in chapter V (5 scrolls)
- Isgaroth in chapter V (3 scrolls)
Ice Wave
Valley of Mines
- A cave to the left before the first gate to the frozen New Camp
Jarkendar
- In the giant minecrawler cave connecting the canyon and the swamp, behind a gravestone
Irdorath
- After entering the great hall with the Black Mage, first room to the right
Merchants
- Cronos in chapter V (4 scrolls)
- Gorax in chapter V (4 scrolls)
- Isgaroth in chapter V (4 scrolls)
- Vatras in chapter VI (2 scrolls)
- Zuris in chapter I (2 scrolls)
Summon Demon
Valley of Mines
- At the top of old Xardas’ Tower, on the table
Irdorath
- In a cave guarded by a troll, in a room to the right (2 scrolls)
Merchants
- Cronos in chapter V (2 scrolls)
- Engor in chapter I (1 scroll)
- Gorax in chapter IV (2 scrolls), chapter V (2 scrolls)
- Isgaroth in chapter V (2 scrolls)
- Karras in chapter V (1 scroll)
- Zuris in chapter I (1 scroll)
Other
- Might drop from Demon Lords
Heal Heavy Wounds
Khorinis
- On Onar’s fields, in the puddle with Lurkers
- On the way from Dead Harpy Tavern to the Pyramids, in a crate next to destroyed caravan
Valley of Mines
- In Silvestro’ mine
Jarkendar
- After crossing the stone arch in the canyon, before entering a cave (2 scrolls)
- In the orc tent in the canyon
Merchants
- Cronos in chapter V (3 scrolls)
- Gorax in chapter V (3 scrolls)
- Isgaroth in chapter V (3 scrolls
Fire Rain
Khorinis
- Small bandit camp behind Sekob’s farm. Climb on the tent and find a wooden beam you can walk on. The scroll is at the end of the path
Valley of Mines
- Cave full of Snappers, can be reached by turning left and going up the mountaint right before the first gate to the frozen New Camp
- Top of the small mountaint right above Diego’s hideout
Jarkendar
- In the burried treasure next to the house of Priests
- In a cave on the far north of the swamp, guarded by a Fire Theind
- In the ruins on the plateau, in front of the hairpin turn on the way to pirate camp with Alligator Jack
Irdorath
- After entering the great hall with the Black Mage, first room to the right
Merchants
- Gorax in chapter IV (2 scrolls)
- Zuris in chapter I (1 scroll)
- Salandril in chapter I (1 scroll)
Army of Darkness
Merchants
- Karras in chapter V (1 scroll)
- Lutero in chapter V (1 scroll)
Shrink Monster
Irdorath
- In the switch puzzle part, first room to the right
Merchants
- Zuris in chapter I (1 scroll)
Wave of Death
Irdorath
- After entering the great hall with the Black Mage, first room to the right
- In the switch puzzle part, first room to the right
Other
- It spawns for Gorax and other scroll vendors only when you learn how to make a rune of this spell
Holy Missile
Other
- This spell does not have its scroll counterpart, and a rune can be created without one.
Holy Light
Merchants
- Martin in chapter I (10 scrols)
Holy Arrow
Merchants
- Martin in chapter I (2 scrols), chapter II (2 scrols), chapter III (2 scrols), chapter IV (2 scrols), chapter V (2 scrols)
Small Healing
- None
Medium Healing
Merchants
- Martin in chapter I (1 scroll), chapter II (1 scroll), chapter III (1 scroll), chapter IV (1 scroll), chapter V (1 scroll),
Large Healing
Merchants
- Martin in chapter II (1 scroll), chapter III (2 scrolls), chapter IV (3 scrolls), chapter V (2 scrolls),
Repel Evil
Merchants
- Martin in chapter II (1 scroll), chapter III (1 scroll), chapter IV (2 scrolls), chapter V (3 scrolls),
Other
- Can be pickpocketed from Oric (85 dexterity requierd)
Destroy Evil
Merchants
- Martin in chapter IV (1 scroll), chapter V (2 scrolls),
|
=���������� ���=
|


-
#1
Свитки Готики 1

Продолжаю описывать Магию в Готике 1. На этот раз свитки. Описание для свитков имеющих идентичные заклинания с рунами делать не стал, информацию можно посмотреть в
теме про руны
.
Свитки с магией Огня
Огненный шар
|
|
Стоит маны (макс.): 5
Урон от огня ( за единицу маны): 30 |


Огненная стрела
|
|
Стоит маны: 1
Урон от огня: 30 |


Огненный шторм
|
|
Стоит маны (макс.):10
Урон от огня (за единицу маны): 50 |

Огненный дождь
|
|
Стоит маны:15
Урон от огня: 100 |

Свитки с магией Воды
Ледяная стрела
|
|
Стоит маны: 1
Урон от магии: 20 |

Ледяная глыба
|
|
Стоит маны: 3
Урон: 50 |

Молния
|
|
Повреждение в секунду:25
Цена: 70 |

Ледяная волна
|
|
Стоит маны: 8
Урон: 50 |
Свитки с магией Спящего
Сон
|
|
Стоит маны: 3
Цена: 50 |

Чары
|
|
Стоит маны: 5
Цена: 50 |

Телекинез
|
|
Стоит маны (в сек): 1
Необходима маны: 10 |
Пирокинез
|
|
Повреждение в секунду:20
Цена: 70 |

Контроль
|
|
Цена: 90
|

Кулак ветра
|
|
Стоит маны (макс.): 3
Урон: 10 |
Кулак шторма
|
|
Стоит маны (макс.): 8
Урон: 15 |
Свитки с магией превращения
Превращение в волка
|
|
Стоит маны:10
Цена: 100 |

Превращение в кротокрыса
|
|
Стоит маны: 5
Цена: 100 |

Превращение в луркера
|
|
Стоит маны:15
Цена: 100 |

Превращение в мракориса
|
|
Стоит маны:25
Цена: 100 |
Превращение в мясного жука
|
|
Стоит маны: 5
Цена: 100 |

Превращение в падальщика
|
|
Стоит маны: 5
Цена: 100 |

Превращение в ползуна
|
|
Стоит маны:20
Цена: 100 |
Превращение в орочью гончую
|
|
Стоит маны:20
Цена: 200 |
Превращение в шершня
|
|
Стоит маны:10
Цена: 100 |
Превращение в ящерицу
|
|
Стоит маны:15
Цена: 100 |
Превращение в снеппера
|
|
Стоит маны:25
Цена: 150 |

Свитки с магией призыва
Вызов скелетов
|
|
Стоит маны:10
Цена: 350 ITARSCROLLSUMMONSKELETONS |
Армия тьмы
|
|
Стоит маны:25
Цена: 666 |
Вызов голема
|
|
Стоит маны:15
Цена: 450 |
Вызов демона
|
|
Стоит маны:20
Цена: 550 |
Другие свитки
Свет
|
|
Стоит маны: 1
Цена: 5 |
Исцеление
|
|
Стоит маны:10
Восстановление жизни: 10 |
Ярость
|
|
Стоит маны:10
Цена: 200 |
Страх
|
|
Стоит маны: 5
Цена: 250 |
Телепорт орков
|
|
Стоит маны: 5
Описание: Это древнее заклинание, которое использовали орки, для телепортации на короткие расстояния. Свиток был разорван на две части, но герой нашёл его на кладбище орков и вместе с баал Люкором восстановил свиток. Свиток может быть использован только на кладбище орков, что бы попасть за каменную плиту. |
Уменьшение монстра
|
|
Стоит маны: 5
Цена: 1000 |
Смерть нежити
|
|
Стоит маны: 5
Повреждение магией: 9999 |
Последнее редактирование: 12 Ноя 2018

-
#2
Пара вопросов: почему описание есть не у всех свитков и почему в последнем спойлере бродят картинки-мутанты, существенно и не очень отличающиеся от всех остальных по размерам.
-
#3
почему описание есть не у всех свитков…
Потому что, их описание уже есть в
этой
теме и по десять раз копировать их на все темы мне не очень хочется)
…и почему в последнем спойлере бродят картинки-мутанты, существенно и не очень отличающиеся от всех остальных по размерам.
Этого вопроса не понял, можешь нормально сформулировать предложение?")
-
#4
Этого вопроса не понял, можешь нормально сформулировать предложение?
Размер иконок Ярость, Уменьшение монстра, Телепорт орков и Страх меньше размера иконок остальных свитков.
Потому что, их описание уже есть в этой теме и по десять раз копировать их на все темы мне не очень хочется)
Лучше б, чтоб все с описанием… Ну да ладно.
-
#5
Размер иконок Ярость, Уменьшение монстра, Телепорт орков и Страх меньше размера иконок остальных свитков.
Вроде всё нормально, не вижу разницы в размерах, если она и есть то только в высоте рисунка, и то на несколько пикселей, а ширина везде 100 пкс.

Митяй
Почетный форумчанин
-
#6
Дракон, поменяй желтый цвет на другой, нечитаемо.
-
#7
Поставил оранжевый цвет Сойдёт?)
Митяй
Почетный форумчанин
-
#8
Ага. Можно конечно было розовый. Для гламура, но и так хорошо.

-
#9
Размер иконок Ярость, Уменьшение монстра, Телепорт орков и Страх меньше размера иконок остальных свитков.
Все нормально там отображается, никаких свитков-мутантов нет, Дракон все нормально сделал.

Dimus
★★★★★★★★★
Супермодератор
-
#10
Дракон, пожалуйста исправь следующие ошибки (выделено другим цветом):
Превращение в лауркера
Описание: Превращает героя в лауркера, при нажатии Enter действие заклинания проходит.
Правильно: «в луркера».
Превращение в собаку орков
Описание: Превращает героя в собаку орков, при нажатии Enter действие заклинания проходит.
Правильно: «в орочью гончую».
Описание: По повелению героя появляются 3 скелета, которые нападают на всех оказавшихся поблизости людей, кроме ГГ.
Описание: По повелению героя появляется множество скелетов, которые нападают на всех оказавшихся поблизости людей, кроме ГГ.
Описание: По повелению героя появляется голем, который нападает всех оказавшихся поблизости людей, кроме ГГ.
Описание: По повелению героя появляется демон, который нападает всех оказавшихся поблизости людей, кроме ГГ.
Слово «людей» здесь явно лишнее, т.к. вызванные ГГ существа нападают на всех, кроме самого ГГ.
-
#11
все нормально там отображается, никаких свитков-мутантов нет
Be5000 наверное имел в виду это —

У меня тоже разные размеры показывает.
-
#12
Дракон, тогда может соединить темы, а то задоблаешся искать нужный свиток по 10-тю темам…
Митяй
Почетный форумчанин
-
#13
Могвай у меня (сейчас на опере) такого нет. Это наверное какой то глюк браузера.
-
#14
Дракон, пожалуйста исправь следующие ошибки (выделено другим цветом):
СпасибоУ меня просто игра по видимому пиратская и есть некоторые различия перевода с лицензией.
Можно конечно было розовый. Для гламура, но и так хорошо.
Митяй, а ты что гламурный кот?)))
Be5000 наверное имел в виду это — 666.jpeg У меня тоже разные размеры показывает.
Может у тебя стоит, что то вроде
этого?
Или просто с браузером проблема? У меня всё нормально отображается.
Дракон, тогда может соединить темы, а то задоблаешся искать нужный свиток по 10-тю темам…
Да и так нормально) Ссылка на тему с рунами есть, сейчас ещё и в той теме ссылку поставлю.
-
#15
У меня тоже разные размеры показывает.
Копайтесь в своих браузерах. Я сижу с Мозиллы и у меня все нормально. Кто знает, может это последствия установленного плагина на расширение окна форума.
-
#16
Я сижу с Мозиллы и у меня все нормально. Кто знает, может это последствия установленного плагина на расширение окна форума.
Я тоже с Мозиллы с установленным расширением — всё отображается нормально.